Introduction
Starknet-Scaffold is a comprehensive, open-source toolkit designed for developing decentralized applications (dApps) on Starknet. This toolkit includes the most popular and functional tools, ensuring an up-to-date development environment.
Starknet-Scaffold was built using a robust technology stack, which includes:
-
NextJS: A powerful React framework that enables server-side rendering and static site generation, improving performance and SEO for web applications. It provides a seamless development experience with features like file-based routing and API routes.
-
Starknet.js: A JavaScript library that allows developers to interact with Starknet, the layer-2 scalability solution for Ethereum. It facilitates the integration of Starknet smart contracts with dApps, enabling functionalities like contract calls and transactions.
-
Starknet-React: A set of React hooks and components designed to work with Starknet.js, making it easier to integrate Starknet functionalities into React applications. It simplifies state management and interaction with Starknet smart contracts within the React ecosystem.
-
Starknetkit: A development toolkit that includes a suite of tools and libraries for building, testing, and deploying Starknet smart contracts. It enhances developer productivity by providing standardized workflows and utilities.
-
Typescript: A typed superset of JavaScript that compiles to plain JavaScript, offering static type definitions and advanced type-checking. It improves code quality and developer productivity by catching errors at compile-time rather than runtime.
-
Scarb: A toolchain manager and build system specifically designed for Starknet projects. It simplifies dependency management, project configuration, and the compilation process for Starknet smart contracts.
-
Starknet-Foundry: A suite of tools for Starknet smart contract development, including testing frameworks, debugging tools, and deployment utilities. It provides a comprehensive environment for building robust and reliable smart contracts on Starknet.
In the subsequent chapters of this documentation, readers will be taken through an in-depth exploration of how Starknet-Scaffold works. Each chapter will guide you step-by-step through its various components and functionalities, providing practical insights and detailed explanations to help you effectively utilize this powerful toolkit.
Quickstart
This section covers installation and setting up of the development environment.
Installation
This documentation provides detailed instructions on how to install and set up Starknet-Scaffold.
Requirements
Before you begin, ensure you have the following tools installed on your system:
Installation Methods
- Using the
create-starknet-appexecutable (recommended). - Cloning the repository from GitHub.
Method One: Using create-starknet-app executable.
The recommended way to get started with Starknet-Scaffold is by using the create-starknet-app executable. This method allows you to choose between different boilerplate types based on your project needs.
-
Run the executable
Open your terminal and run:
npx create-starknet-appYou'll be prompted for a project name, and a package type, enter both to proceed.
Available package types include:
-
contract-only: For a project that require just contract-related tools (no frontend).
-
fullstack: For full stack projects. Provides customizable out-of-the-box UI components.
-
dojo: For gaming projects which needs access to the dojo stack.
-
debugger: For projects with need to utilize the full debugging suite.
Once installation is completed, navigate to the project directory:
cd my-project -
Method Two: Cloning the repository from GitHub.
To get started with Starknet-Scaffold via GitHub, follow these steps:
-
Clone the repository:
Clone the Starknet-Scaffold repository from GitHub to your local machine. Open your terminal or command prompt and run the following command:
git@github.com:horuslabsio/Starknet-Scaffold.git -
Navigate to the Project Directory
After cloning, navigate into the project directory by running:
cd Starknet-Scaffold
PS: The executable automatically installs Scarb and Starknet Foundry, if you do not have them installed locally.
Environment
Getting Started
After setting up your project, follow these steps to get your development environment running smoothly:
-
Install the required dependencies
Navigate to your project directory and install the required dependencies:
cd my-appnpm run installThis will download and install all the important packages specified in the
package.jsonfile, including Scarb, Starknet Foundry and dojo if not initially present.PS: This is only necessary if you installed by cloning. All these are done automatically when you use the
create-starknet-appexecutable. -
To build your Cairo contracts:
npm run build-contracts -
To start your development server, run:
npm run startThis command kickstarts a local development server for your new project.
Starknet-Scaffold provides other scripts to facilitate development. We will cover more of these available scripts in the coming chapters.

You now have a fully set up and running installation of Starknet-Scaffold at https://localhost:3000. For further customization and detailed instructions, please refer to the documentation.
Tool version
Starknet Scaffold v0.5.0
- Cairo: v2.7.0
- Scarb: v2.7.0
- Starknet Foundry: v0.27.0
- starknet-react/chains: v0.1.7
- starknet-react/core: v2.9.0
- Starknet.js: v6.11.0
UI Components
An overview of the different UI components available on Starknet Scaffold. Starknet Scaffold provides a set of pre-built components for common web3 use cases. You can make use of them to accelerate and simplify your dapp development.
- Connect Button & Connect Wallet Modal
- Address Bar & User Modal
- Transaction History
- Add Token
- Account Balance
- Network Switcher
Connect Button
The custom connect button is located in the header of the page and facilitates the connection of a user's Starknet wallet to the dapp. When clicked, it triggers a custom wallet modal that appears at the center of the screen.
Connect Wallet Modal
The connect wallet modal is a UI component that appears when the connect button is clicked. Its primary function is to allow users to select the wallet they wish to use to connect to the dapp.
The modal is divided into two sections:
-
Left side: Lists popular Starknet wallets available for connection, including:
- Argent X
- Braavos
- Argent Web Wallet
- Argent (mobile)
- Bitget
- OKX
When an option is clicked, the corresponding wallet's modal (if installed) opens, allowing the user to unlock their wallet and connect. Once connected, the user is redirected to the dapp.
- Right side: Provides information to educate users on how wallet connections work.
Import
import ConnectButton from "~/app/components/lib/Connect";
Usage
<ConnectButton />
Props
| Prop | Type | Description |
|---|---|---|
| text? | string | Name of the button (optional) |
| className? | string | CSS class for button (optional) |
Address Bar & User Modal
Address Bar
The Address Bar displays the address of the connected account. If the connected wallet has a Starknet.id, the Address Bar will display the Starknet.id pfp and name. If not, a Blockies-generated image representation of the connected address is displayed alongside a shortened version of the address.
User Modal
The User Modal is a component that is triggered from the Address Bar. It provides the following details about the connected account:
- Profile Picture & Address: Displays either the user's Starknet.id profile picture or a Blockies-generated image representing the connected address.
- Wallet Address: Shows the wallet address, which can be copied by the user.
- Account Balance: Displays the current ETH and STRK balance of the connected wallet.
- Disconnect Button: Provides an option for the user to disconnect their wallet from the dapp.
Import
import AddressBar from "~/app/components/lib/AddressBar";
Usage
<AddressBar />
Transactions History
This component displays the list of transactions performed by the connected wallet.
Each transaction item shows the following:
- Transaction status: represented by icons. The status of a transaction can be one of the following:
completed,pending, orfailed. - User address
- Transaction time and date
- "See transaction": redirects the user to view the transaction on a block explorer.
Import
import TransactionsButton from "~/app/components/lib/Transactions";
Usage
<TransactionsButton />
Props
| Prop | Type | Description |
|---|---|---|
| text? | string | Name of the button (optional) |
| className? | string | CSS class for button (optional) |
Add Token
The Add Token component enables users to add a custom token to their wallet. To successfully add a token, users need to provide the following information:
- Contract Address: The contract address of the token.
- Token Name: The name of the token.
- Token Symbol: The token's symbol.
- Decimals: The decimal for the token.
Once all fields are filled out, users can click the Add Token button to add the custom token to their wallet.
Import
import AddTokenButton from "~/app/components/lib/AddToken";
Usage
<AddTokenButton />
Props
| Prop | Type | Description |
|---|---|---|
| text? | string | Name of the button (optional) |
| className? | string | CSS class for button (optional) |
Account Balance
This component shows the STRK and ETH balance of the connected wallet address.
Import
import AccountBalance from "~/app/component/AccountBalance";
Usage
<AccountBalance address="0x34aA3F359A9D614239015126635CE7732c18fDF3"/>
Props
| Prop | Type | Description |
|---|---|---|
| address | string | Address in 0x___ format. |
Network Switcher
This component allows users to switch between Starknet networks (mainnet/sepolia).
Import
import NetworkSwitcher from "~/app/components/lib/NetworkSwitcher";
Usage
<NetworkSwitcher />
Tour Guide
Starknet Scaffold provides a suite of tools and features aimed at simplifying your development experience. This section provides insight on how to make use of the various features available.
Deployer
The scaffold deployer is a simple tool for seamlessly declaring and deploying smart contracts to Starknet testnet and mainnet.
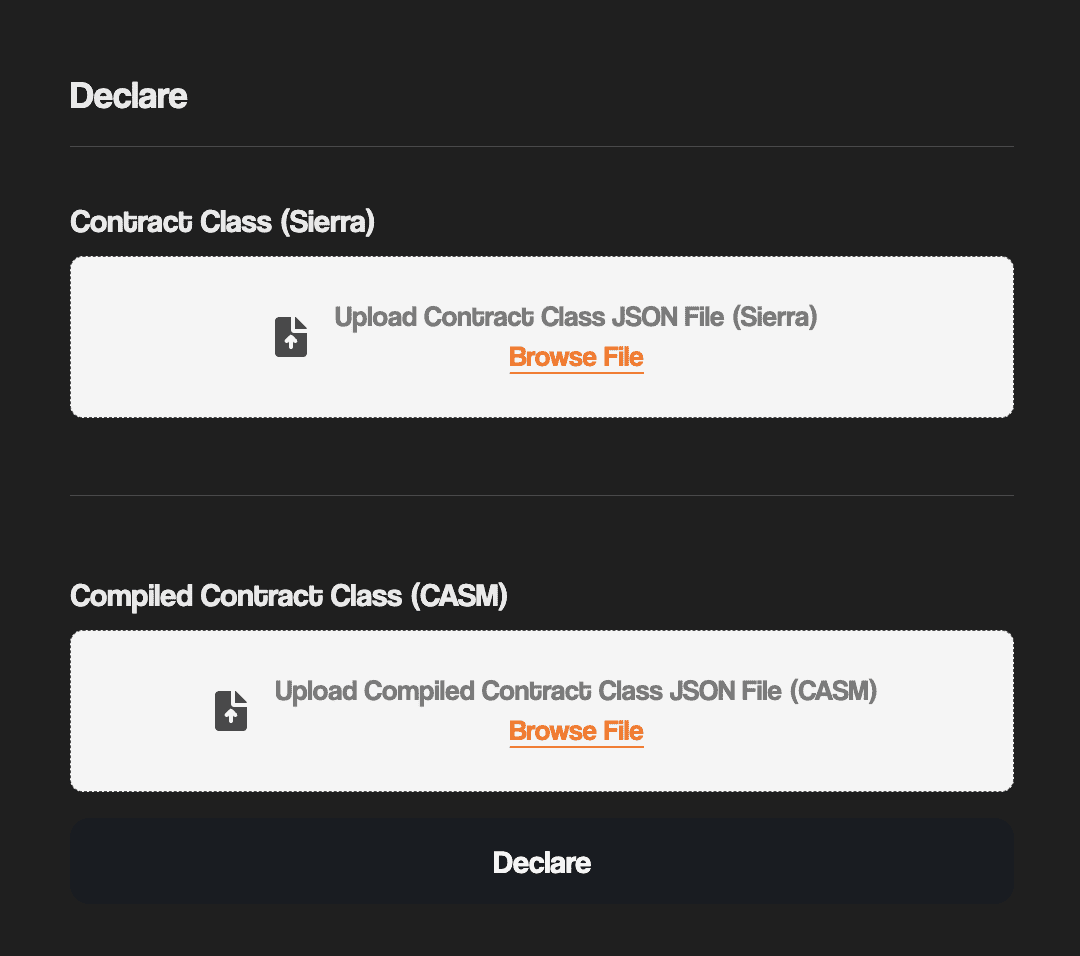
This tools interface consists of two sections; the declare and deploy section.
Declare section
This section takes in the Contract Class JSON file (Sierra) and the Compiled Contract Class JSON file (CASM), then declares the contract. Once declared, a class hash is returned which can be used to deploy the contract.
Deploy section
This section takes in the declared class hash and its constructor arguments, then deploys the contract.

Burner Wallet
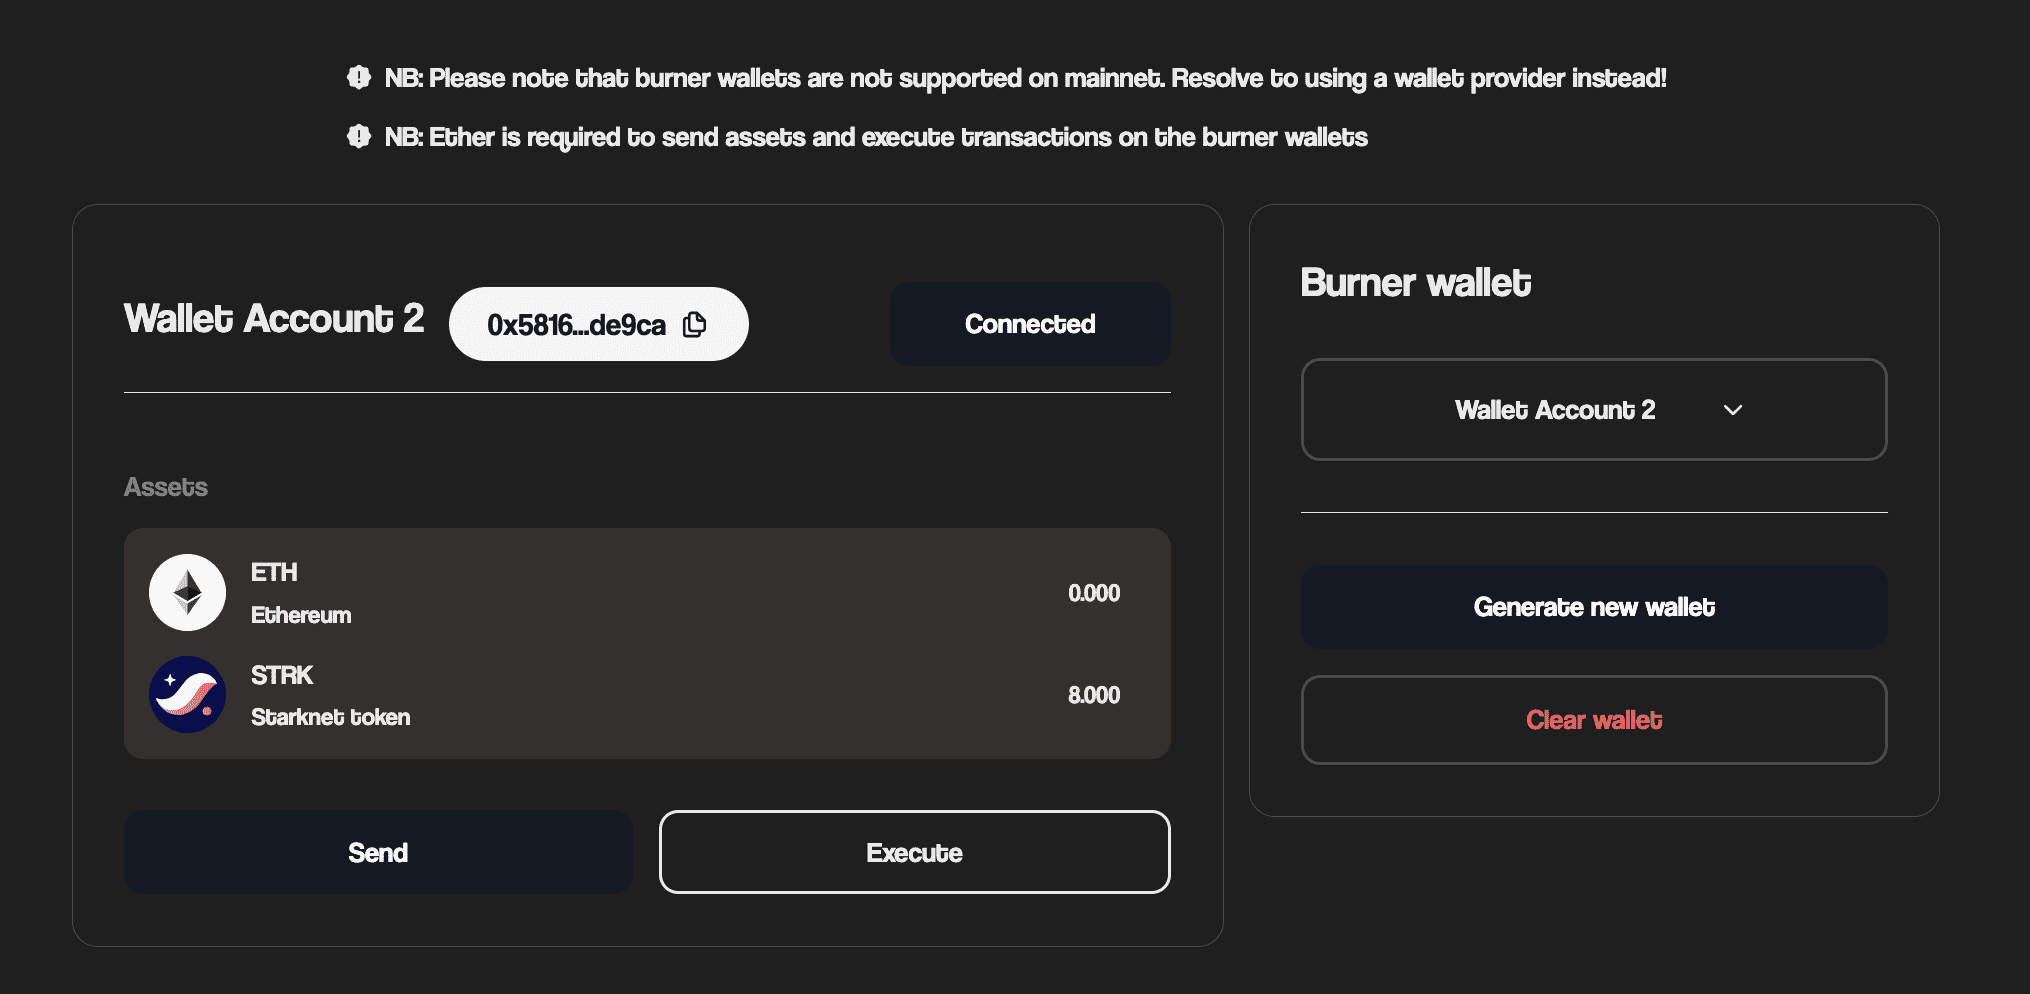
The Burner wallet tool enables users to generate temporary wallets for use during the course of development. Burner wallets are only supported on the Sepolia network and a user can only generate a maximum of five wallets at a time.
A generated wallet UI gives us information such as ETH and STRK balance and address. The burner wallet can be funded using the Faucet tool.
In order for the generated burner wallet to be used, it has to be connected. After connection, the user can use it for the following;
-
Transfer of tokens(ETH/STRK): Transfer tokens by inputting the recipient address and amount.
-
Execute smart contract calls: Execute functions from other smart contracts by inputting the contract address, function name and arguments.
Users have the ability to also clear the generated wallets.
Faucet
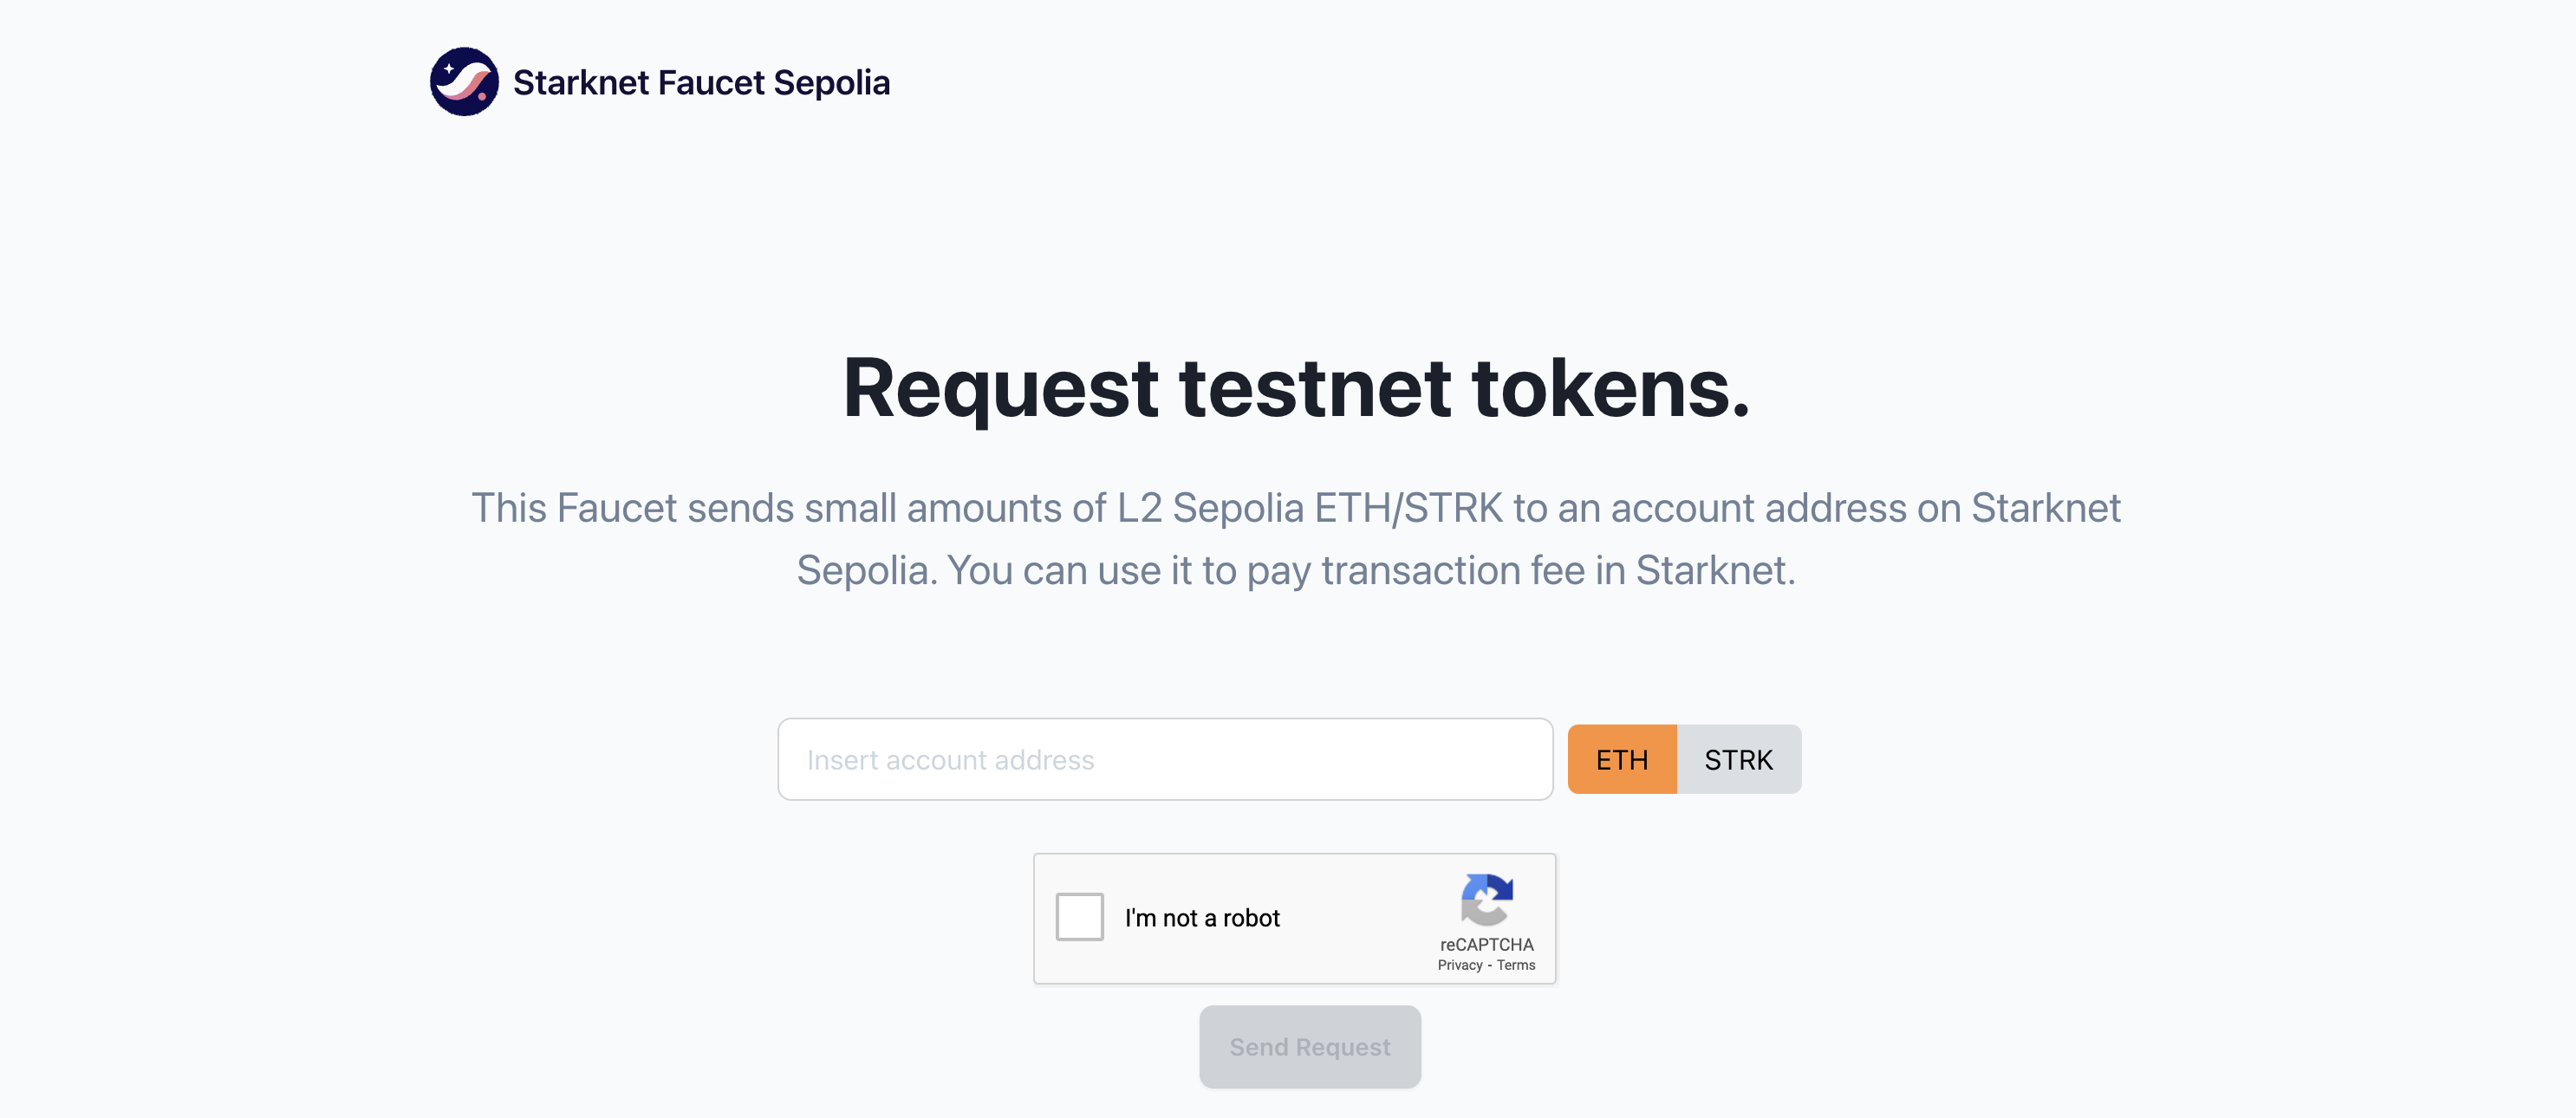
This is a sepETH/sepSTRK faucet tool built by the Starknet Foundation. You can claim ETH/STRK sepolia testnet tokens for development. This tool can be used to fund generated burner wallets.
Wikipedia
The Wikipedia is a collection of Starknet/Cairo learning resources within the ecosystem.
The columns of the table are:
- Name: The name of the resource.
- Description: A short description of the mentioned tool.
- Status: Indicates whether the tool/resource is up-to-date or not.
- URL: A link to the tool/resource.
This tool also includes a search functionality to easily find resources.

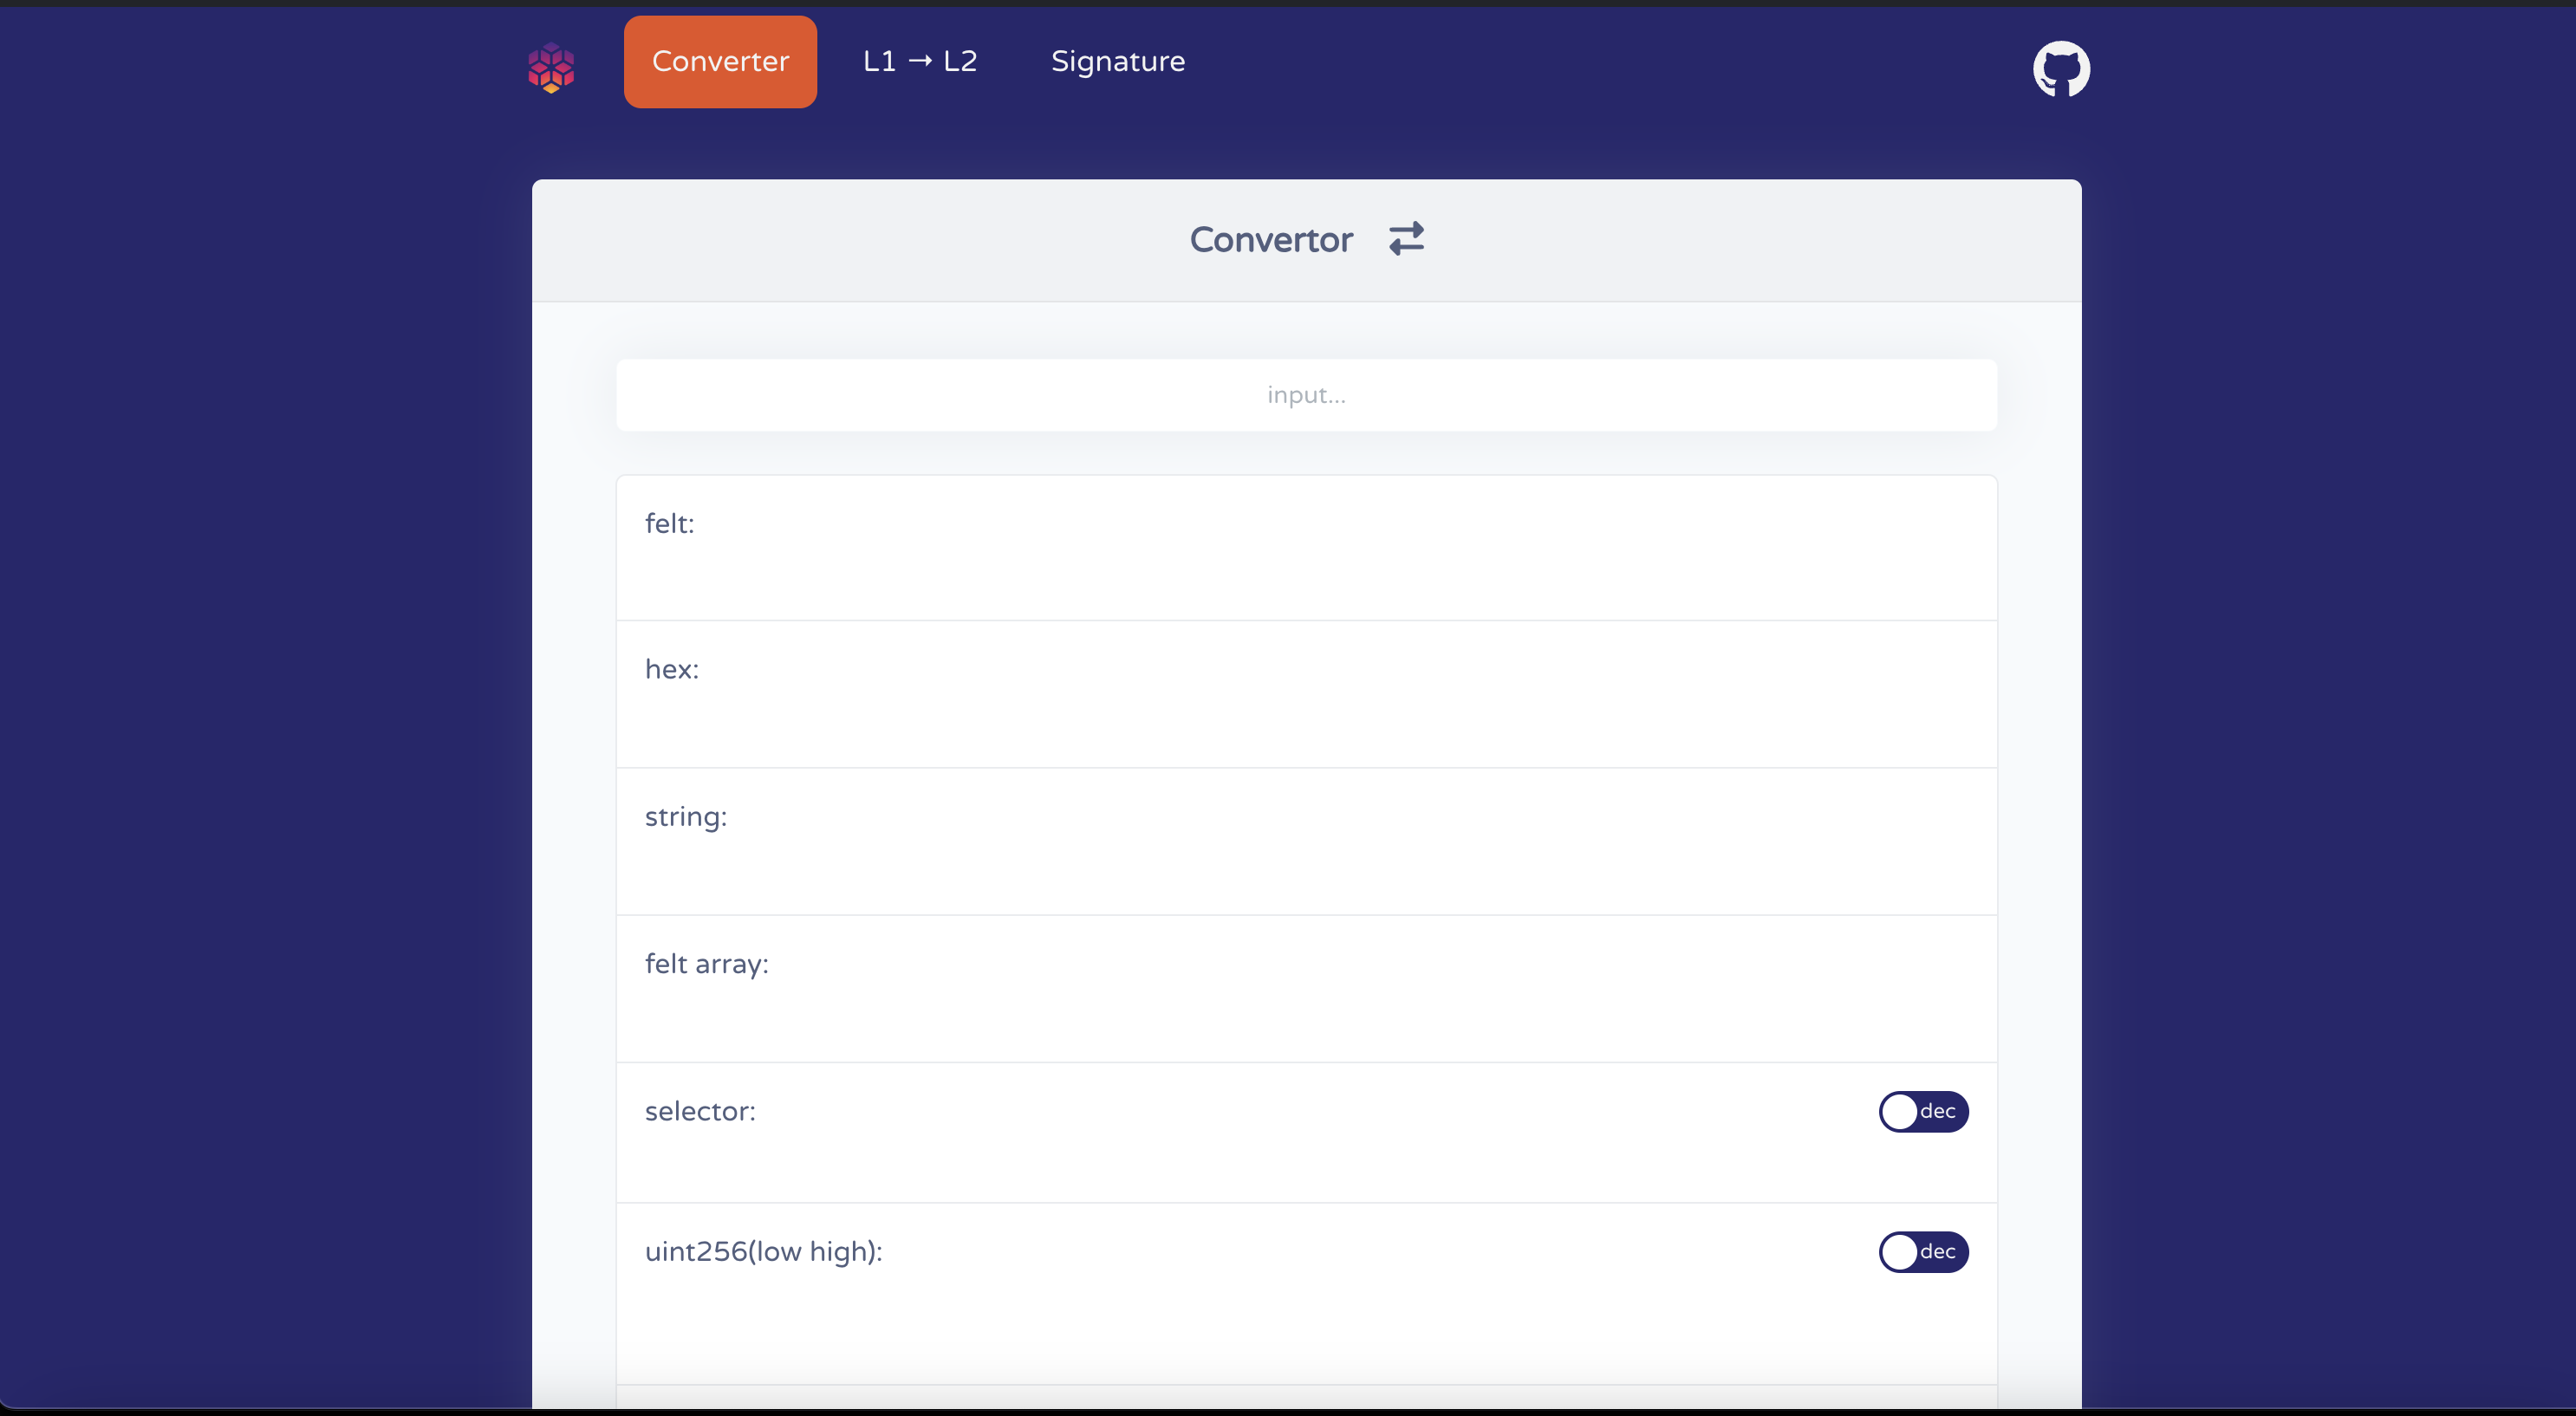
Converter
A collection of utility functions for Starknet related conversions. Convert between hex, felts, strings, selectors and uint256s.
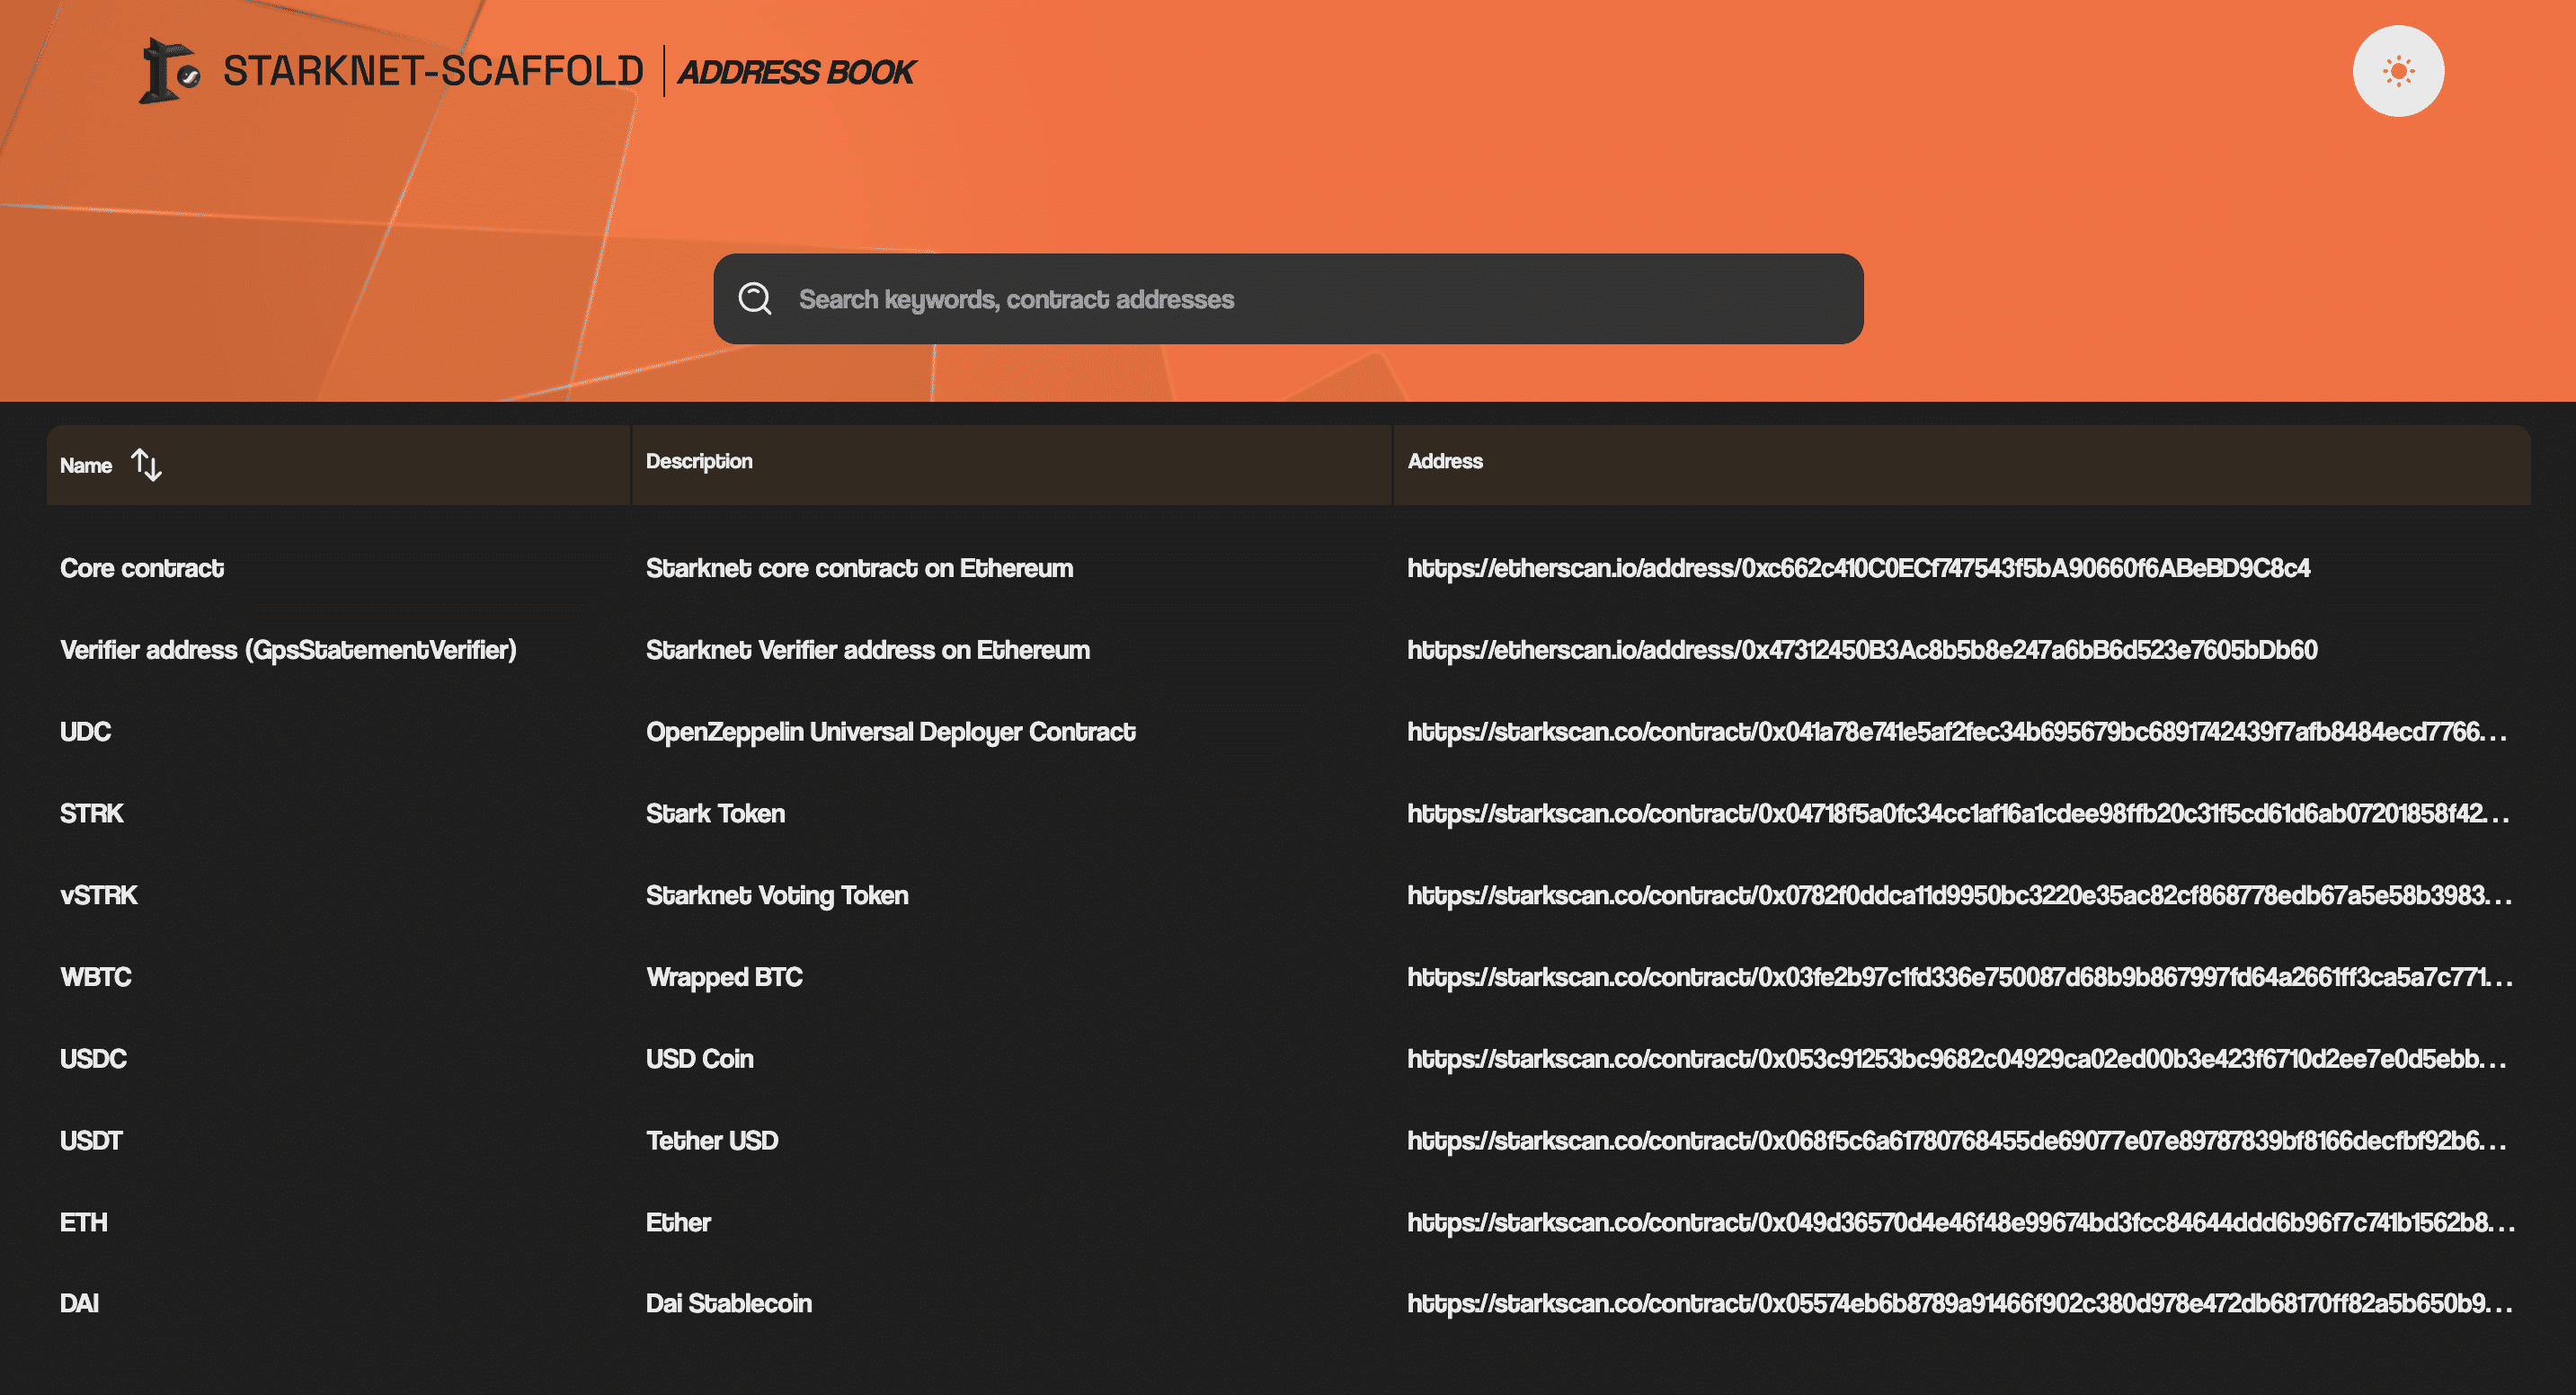
Address Book
The address book contains a list of all relevant contract addresses within the starknet ecosystem.
Scripts Overview
Contract Scripts
Below are npx scripts provided by Starknet-Scaffold for your smart contract development.
Build Contract
To build your contracts:
npm run build-contracts
Format contracts
Leverage Scarb’s native formatting capabilities by running:
npm run format-contracts
Verify contracts
To verify your smart contracts, from the base repository run:
npm run verify-contracts --contract-address=<CONTRACT_ADDRESS> --contract-name=<CONTRACT_NAME> --network=<NETWORK>
Test contracts
To run your Starknet Foundry tests:
npm run test-contracts
Run custom starknet-foundry scripts
To run a custom starknet foundry deploy/declare/invoke script:
npm run contract-scripts <SCRIPT_NAME> --url=<RPC_URL>
Generate an SRC-5 interface ID for your contracts
To generate an SRC-5 interface ID, run:
npm run generate-interface <PATH_TO_INTERFACE>
Prepare Account for deployment
To prepare your account for deployment, run:
npm run prepare-account --url=<RPC_URL> --name=<ACCOUNT_NAME> <PROFILE_NAME>
generates a profile which is added to scarb.toml and can be passed to other commands.
Deploy Account
To deploy an account:
npm run deploy-account --profile=<MY_PROFILE> --name=<ACCOUNT_NAME> --fee-token=<FEE_TOKEN> --max-fee=<MAX_FEE>
where the profile is gotten from snfoundry.toml, name is the prepared account and maxfee is the specified max fee.
Delete Account
To delete an account:
npm run delete-account --profile=<MY_PROFILE> --account-file=<PATH_TO_ACCOUNT_FILE> --name=<ACCOUNT_NAME> --network=<alpha-mainnet | alpha-goerli>
Declare Contract
To declare a Starknet contract:
npm run declare-contract --profile=<MY_PROFILE> --contract-name=<CONTRACT_NAME> --url=<RPC_URL> --fee-token=<FEE_TOKEN>
Deploy Contract
To deploy a contract:
npm run deploy-contract --profile=<MY_PROFILE> --feetoken=<FEE_TOKEN> --class=<CONTRACT_CLASSHASH> --url=<RPC_URL>
Starknet-Devnet
Confirm that Docker is installed and running to use starknet-devnet. To run devnet:
npm run devnet
Dojo Scripts
The contracts folder contains all the tools needed to write, build, test and deploy dojo projects. It is built with sozo and katana. Here are common operations you can perform on your dojo contracts.
Initialize Dojo Project
To initialize a dojo project, from the base repository:
npm run initialize-dojo --name=<PROJECT_NAME>
Build Dojo Project
To build your dojo project, from the base repository run:
npm run build-dojo --name=<PROJECT_NAME>
Deploy Katana
To build deploy katana, from the base repository run:
npm run deploy-dojo-katana --name=<PROJECT_NAME>
Migrate Dojo Project
To migrate your dojo project, from the base repository run:
npm run migrate-dojo --name=<PROJECT_NAME>
User Interface Scripts
The following are scripts from Starknet-Scaffold for handling the user interface.
Run Frontend
To run UI, from the base repository:
npm run start
Run Frontend
To build your frontend, from the base repository run:
npm run build-ui
Spinning up and using Devnet
Introduction
Starknet Devnet is a development network (devnet) implemented in Rust. With Devnet, you can simulate Starknet in the comfort of your local network. Fork mainnet/testnet to interact with real-world smart contracts, while maintaining isolation.
Prerequisites:
Docker has to be installed for the script to work.
Run Starknet-Devnet
To run starknet-devnet:
npm run devnet
Check out the official starknet devnet documentation here.
Address Book
This provides a detailed list of relevant contract addresses on Starknet, including core contracts, various token contracts, and OpenZeppelin contracts. These addresses are essential for developers and users interacting with the Starknet ecosystem, as they allow you to access, interact with, and integrate various functionalities within the starknet network.
Starknet Contracts
| Name | L1 Contract Address |
|---|---|
| Core Contract | 0xc662c410C0ECf747543f5bA90660f6ABeBD9C8c4 |
| GpsStatementVerifier | 0x47312450B3Ac8b5b8e247a6bB6d523e7605bDb60 |
| STRK | 0x04718f5a0fc34cc1af16a1cdee98ffb20c31f5cd61d6ab07201858f4287c938d |
Tokens
| Name | L2 Contract Address | L2 Bridge Contract | L1 Contract Address | L1 Bridge Contract |
|---|---|---|---|---|
| Ether | 0x049d36570d4e46f48e99674bd3fcc84644ddd6b96f7c741b1562b82f9e004dc7 | 0x073314940630fd6dcda0d772d4c972c4e0a9946bef9dabf4ef84eda8ef542b82 | 0x0000000000000000000000000000000000000000 | 0xae0Ee0A63A2cE6BaeEFFE56e7714FB4EFE48D419 |
| DAI | 0x00da114221cb83fa859dbdb4c44beeaa0bb37c7537ad5ae66fe5e0efd20e6eb3 | 0x075ac198e734e289a6892baa8dd14b21095f13bf8401900f5349d5569c3f6e60 | 0x6B175474E89094C44Da98b954EedeAC495271d0F | 0x9f96fe0633ee838d0298e8b8980e6716be81388d |
| USD Coin | 0x053c91253bc9682c04929ca02ed00b3e423f6710d2ee7e0d5ebb06f3ecf368a8 | 0x05cd48fccbfd8aa2773fe22c217e808319ffcc1c5a6a463f7d8fa2da48218196 | 0xA0b86991c6218b36c1d19D4a2e9Eb0cE3606eB48 | 0xF6080D9fbEEbcd44D89aFfBFd42F098cbFf92816 |
| Tether USD | 0x068f5c6a61780768455de69077e07e89787839bf8166decfbf92b645209c0fb8 | 0x074761a8d48ce002963002becc6d9c3dd8a2a05b1075d55e5967f42296f16bd0 | 0xdAC17F958D2ee523a2206206994597C13D831ec7 | 0xbb3400F107804DFB482565FF1Ec8D8aE66747605 |
| Wrapped BTC | 0x03fe2b97c1fd336e750087d68b9b867997fd64a2661ff3ca5a7c771641e8e7ac | 0x07aeec4870975311a7396069033796b61cd66ed49d22a786cba12a8d76717302 | 0x2260FAC5E5542a773Aa44fBCfeDf7C193bc2C599 | 0x283751A21eafBFcD52297820D27C1f1963D9b5b4 |
| Lords | 0x124aeb495b947201f5fac96fd1138e326ad86195b98df6dec9009158a533b49 | 0x7c76a71952ce3acd1f953fd2a3fda8564408b821ff367041c89f44526076633 | 0x686f2404e77ab0d9070a46cdfb0b7fecdd2318b0 | 0x023A2aAc5d0fa69E3243994672822BA43E34E5C9 |
| Starknet Wrapped Staked Ether | 0x042b8f0484674ca266ac5d08e4ac6a3fe65bd3129795def2dca5c34ecc5f96d2 | 0x0088eedbe2fe3918b69ccb411713b7fa72079d4eddf291103ccbe41e78a9615c | 0x7f39c581f595b53c5cb19bd0b3f8da6c935e2ca0 | 0xbf67f59d2988a46fbff7ed79a621778a3cd3985b |
OpenZeppelin
| Name | Contract Address |
|---|---|
| OpenZeppelin Universal Deployer | 0x041a78e741e5af2fec34b695679bc6891742439f7afb8484ecd7766661ad02bf |
Contributing Guide
Welcome to the Starknet Scaffold contributing guide! Thank you for investing your time in contributing to our project. This guide aims to provide a comprehensive overview of the contribution workflow, ensuring an effective and efficient process for everyone involved.
About the Project
Starknet-Scaffold, an open-source, up-to-date toolkit for building decentralized applications (dapps) on Starknet. It's designed to make it easier for developers to create and deploy smart contracts and build user interfaces that interact with those contracts. It makes forking the Starknet development stack easy through a frontend that adapts to smart contracts, and scripts optimized to make contract building, declaring and deploying a breeze. README to get an overview of the project.
Our Vision
Our goal is to provide the primary building blocks for creating dApps. While the repository can be forked to include additional integrations and features, we aim to keep the main branch simple and minimalistic.
Project Status
The project is under active development. You can view open issues, follow the development process, and contribute to the project.
Getting Started
You can contribute to this repository in several ways:
- Solve open issues
- Report bugs or request new features
- Improve the documentation
General Contribution Guidelines
1. Understand Our Project: Starknet-Scaffold, an open-source, up-to-date toolkit for building decentralized applications (dapps) on Starknet.
2. Search Existing Issues and Pull-Requests (PRs): Before creating a new issue or Pull-Request (PR), check if a similar one already exists.
3. Communication: For more developer resources and questions - @0xdarlington
4. Focused Contributions: Contributions should either fix/add functionality or address style issues, but not both.
5. Provide Context: When reporting an error, explain what you were trying to do and how to reproduce the error.
6. Consistent Formatting: Use the same formatting as in the repository. Configure your IDE using the included prettier/linting config files.
7. Update Documentation: If applicable, edit the README.md file to reflect any changes you make.
8. Respond to Feedback: Engage with maintainers and reviewers, making necessary changes and improvements based on their feedback.
9. Be Patient: Understand that maintainers are often busy and it may take time for your PR to be reviewed and merged.
10. Monitor Your Contribution: Keep an eye on your PR and address any further comments or requested changes. Stay Engaged: Continue to contribute, help others, and be an active member of the community. By following these guidelines, you can make meaningful contributions to Our open-source project and become a valuable member of Our open-source community
Issues
Issues are used to report problems, request new features, or discuss potential changes before creating a Pull-Request PR.
Solving an Issue
-
Find an Issue: Browse existing issues to find one that interests you. existing issues
-
Assign the Issue: If you find an issue to work on, assign it to yourself.
-
Open a PR: Once you've addressed the issue, open a PR with your fix.
Creating a New Issue
If a related issue doesn't exist, you can open a new one. Here are some tips for creating a new issue:
-
Provide as much context as possible.
-
Include steps to reproduce the issue or the reason for the feature request.
-
Add screenshots, videos, etc., to clarify your points.
Pull Requests
We follow the "fork-and-pull" Git workflow: We follow the "fork-and-pull" Git workflow
- Fork the Repo: Create a fork of the repository.
Example: User A visits our main-repo repository on GitHub, https://github.com/argentlabs/Starknet-Scaffold and clicks the Fork button, creating a personal copy of the repository under their own GitHub account (e.g., userA/Starknet-Scaffold).
- Clone the Project: Clone your fork locally.
git clone https://github.com/userA/Starknet-Scaffold

cd Starknet-Scaffold
- Create a Branch: Create a new branch with a descriptive name. User A creates a new branch for their feature or bug fix. This ensures the main branch (typically main or master) remains clean and unaffected by ongoing work:
git checkout -b new-feature
- Commit Changes: Commit your changes to the new branch. User A makes the necessary changes to the code, adds the modified files, and commits the changes:
git add .

git commit -m "Add new feature to improve performance"
- Push Changes: Push your changes to your fork. User A pushes the changes in the new-feature branch to their forked repository on GitHub.
git push origin new-feature
- Open a PR: Open a PR in the main repository and tag a maintainer for review.
Tips for a High-Quality Pull Request
Creating a high-quality pull request (PR) in open-source projects increases the likelihood of your contributions being accepted and appreciated. Here are some tips for crafting a high-quality pull request:
1. Understand the our Contribution Guidelines:
-
Read CONTRIBUTING.md: Follow the project-specific instructions for contributing.
-
Adhere to Coding Standards: Ensure your code complies with the project's coding style and standards.
2. Clear and Descriptive Title:
- Concise Summary: Use a clear, concise title that summarizes the purpose of the PR.
3. Detailed Description:
-
What and Why: Explain what changes you made and why they are necessary.
-
Issue References: Reference relevant issues by number (e.g., "Fixes #123").
-
Impact: Describe the impact of your changes on the project.
4. Small and Focused Changes:
-
Single Purpose: Each PR should address a single issue or feature. Avoid bundling multiple changes in one PR.
-
Incremental Changes: If you have multiple related changes, consider submitting them in smaller, incremental PRs.
5. Documentation:
-
Update Documentation: Ensure any relevant documentation is updated to reflect your changes.
-
Code Comments: Add comments in your code where necessary to explain complex logic.
6. Testing:
-
Include Tests: Add or update tests to cover your changes.
-
Pass All Tests: Ensure all existing and new tests pass. Run the test suite locally before submitting the PR.
7. Commit Quality:
-
Atomic Commits: Make small, logical commits. Each commit should be a single, self-contained change.
-
Meaningful Commit Messages: Write clear, descriptive commit messages that explain the intent of each change.
8. Code Review Readiness:
-
Clean Up: Remove any unnecessary code, comments, or debug statements.
-
Consistent Formatting: Follow the project's formatting guidelines and use linting tools if available.
9. Engage with the Community:
-
Seek Feedback Early: If unsure about your approach, seek feedback early by discussing your plan in an issue or community forum before submitting the PR.
-
Respond Promptly: Be responsive to feedback and make requested changes promptly.
10. Polish Your PR:
-
Proofread: Check for typos and grammatical errors in your description and comments.
-
Visual Enhancements: If your PR affects the UI, you can include before and after screenshots or a short video.
By following these tips, you can create a high-quality pull request that is more likely to be accepted and appreciated by the maintainers and the community.
After Submitting Your PR
-
Review Process: We may ask questions, request additional information, or suggest changes. These requests aim to clarify the PR for everyone and ensure a smooth interaction process.
-
Resolve Conversations: As you update your PR and apply changes, mark each conversation as resolved.
-
Merging: Once the PR is approved, we will "squash-and-merge" to keep the git commit history clean.
Thank you for your contributions to Starknet-Scaffold! We appreciate your efforts in helping us build and improve this project.